Introduction:
With the amount of customer data amassed and monitored across different organizations within your business, it is essential that your reports be readily accessible and visually beneficial to assist with identifying behavioral trends or spotting potential issues that may require further analysis. By creating and managing customized workspaces, you can develop dashboards that best fit your business needs and offer a valuable view into your business performance.
Key benefit:
Procedure:
Starter workspace
Tealeaf on Cloud includes a preconfigured "Starter" workspace, which is the default homepage for all Tealeaf on Cloud first-time users. The starter workspace serves as a quick-start workspace and includes a set of standard ready-to-use reports that you can run against existing applications.
Note: The starter workspace cannot be edited or deleted
Create your own workspaces
To create new workspaces to display the information that is most important to you and your business, doing the following:
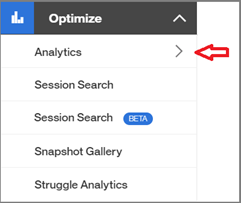
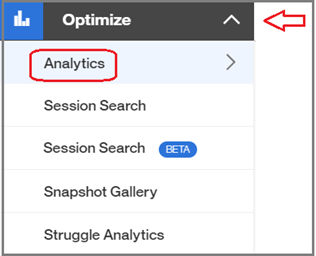
1. From the left navigation in Tealeaf, go to Optimize and select Analytics, as shown in the image below.

2. For your first workspace, click Create a new workspace which will appear in the middle of your screen, as shown in the image below.

Note: The Create new workspace button only displays for the first workspace you create.
3. To create future workspaces, click the plus (+) sign in the upper workspace menu bar, as shown in the image below.

4. In the “Create workspace” window, as shown in the above image, you can enter the name and description for the workspace and optionally select a Category, then click to save your workspace.
Note: Categories can help you organize your work, which can be beneficial if you are working on separate projects or performing various types of analysis across different areas of your business. Categories can be created for personal workspaces (i.e. My Workspace) and Public workspaces. Please see more on managing categories below.
Populate your workspaces
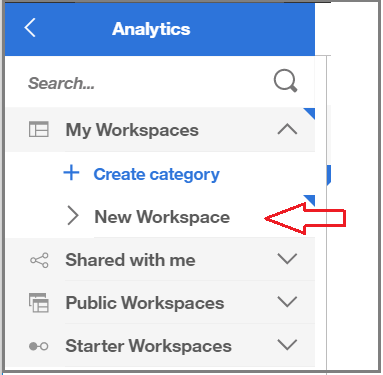
5. After creating a new workspace, you can expand My Workspaces under Analytics from the left navigation to see your newly created workspace, as shown with a red arrow in the image below. (Our newly created workspace in the below example is titled “New Workspace.”)
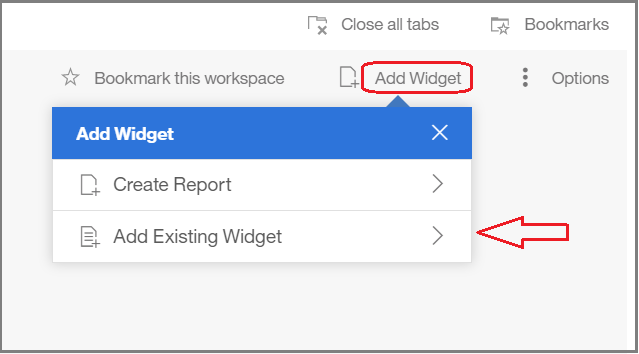
6. From your newly created workspace, you can select to Add Widget from the upper right of your workspace. You can then select to Add existing widget, as shown in the image below, or select to create a report to be added to your workspace.
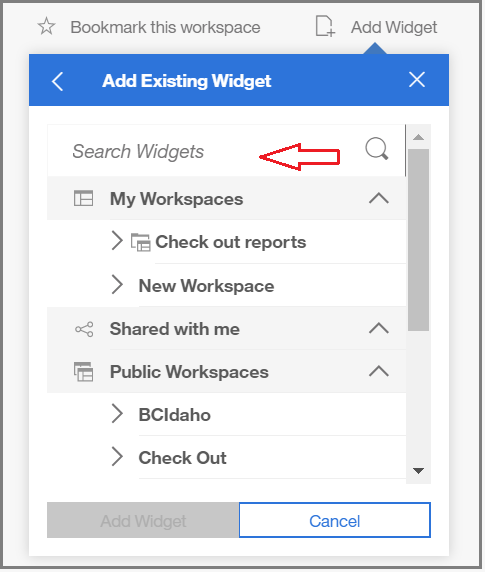
7. In the Widget actions page, as shown in the image below, you can search for widgets or expand the workspaces to see available widgets, and then click to add one or more widgets to your workspace.
Managing workspaces
1. Select Optimize from the left navigation, and then select Analytics to display your available workspaces, as shown in the image below.

2. From the workspace list displayed, as shown in the image below, select the workspace you would like to set as your home workspace.

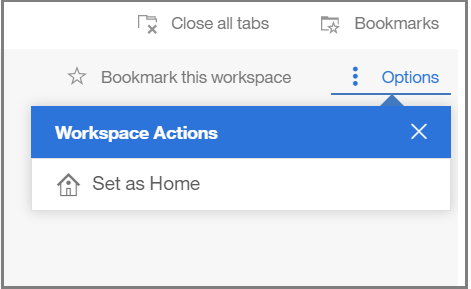
3. From the upper right of your workspace, select Options and then Set as Home, as shown in the image below.
4. To set a different workspace as your homepage, you can select Options and then Change workspace from the upper right of your current workspace that is set at your home page. You can then select the workspace from the list that you would like to update as your home workspace and click Apply.
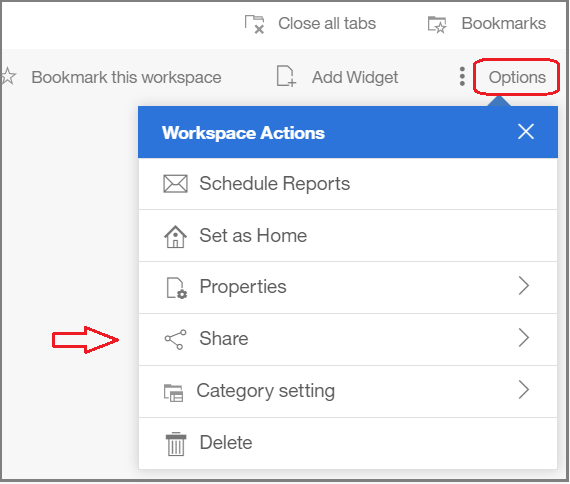
1. From the workspace that you would like to share, select Options and then Share from the upper right of the workspace, as shown in the image below.
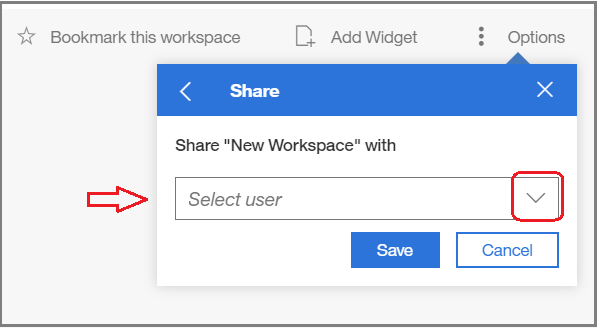
2. After selecting Share from the Workspace Actions box, you can select the user(s) you would like to share your workspace with by selecting from the users displayed, as shown in the image below, and then click Save.
1. Select Optimize from the left navigation, and then select Analytics to display your available workspaces, as shown in the image below.
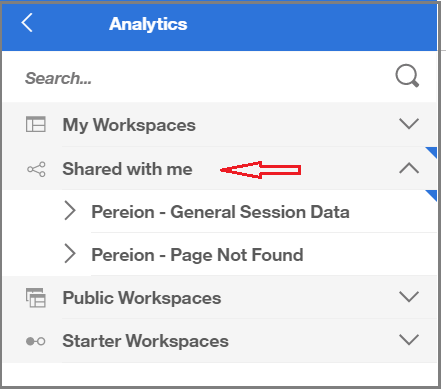
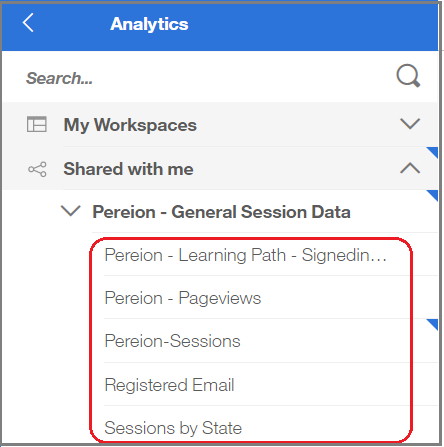
2. Select Shared with me from the list of workspaces displayed, as shown in the image below, to view the workspaces that have been shared with you.
3. Click to view the desired workspace category, as shown in the image below, and access the associated reporting on the shared workspace.
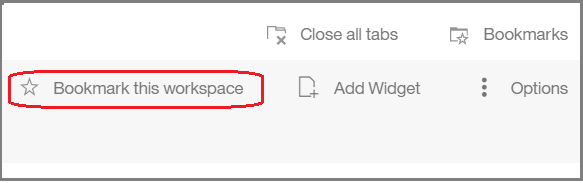
1. From the workspace you would like to bookmark, select “Bookmark this workspace” from the upper right of the workspace screen, as shown in image below.
Managing workspace categories:
As we mentioned above, categories can assist with organizing workspaces for your personal workspace (My Workspace) or Public workspace (workspaces that everyone in the organization has access to.)
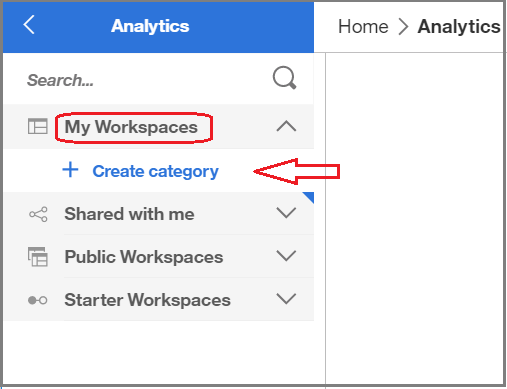
1. To create a workspace category for yourself in My Workspaces, go to Optimize on the left navigation and then select Analytics, as shown in the image below.

2. Go to My Workspaces and click + Create category, as shown in the image below.
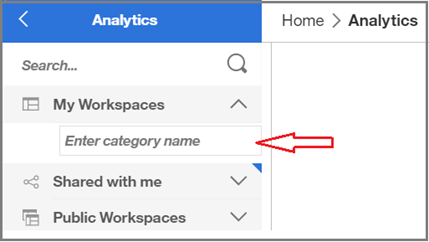
3. Enter a category name and press Enter, as shown in the image below.
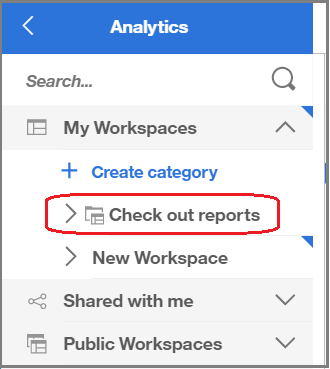
4. The category is then added to My Workspaces, as shown in the image below, where we created a “Check out reports” category in this example.
5. From the left navigation pane you can manage workspace categories, as shown by the highlighted icons in the image below, including:
a. Move the workspace category container by dragging it to a new location.
b. Edit the name of your workspace category.
c. Delete the workspace category.

1. To create a workspace category for your organization Public Workspaces, go to Optimize on the left navigation and then select Analytics, as shown in the image below.
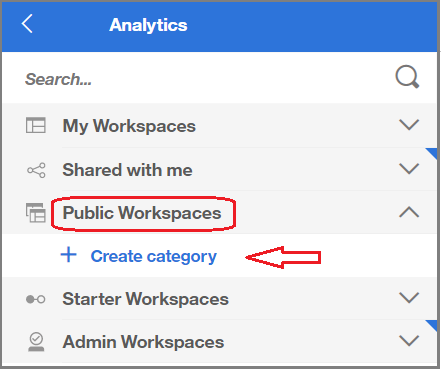
2. Go to Public Workspaces and click + Create category, as shown in the image below.
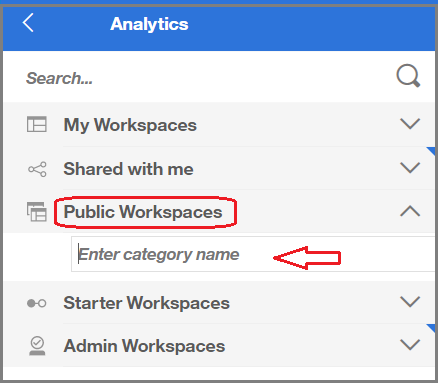
3. Enter a category name, as shown in the image below, and press Enter.
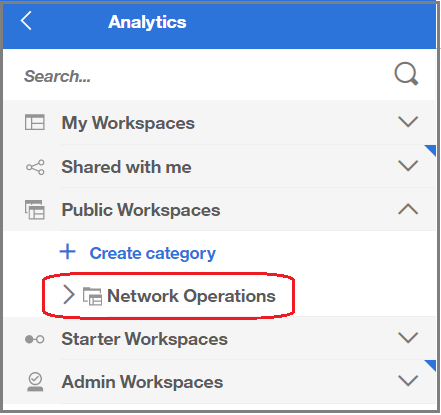
4. The category is then added to Public Workspaces, as shown in the image below. In this example, we created a category for “Network Operations.”
Note: When a user shares a workspace they created to Public Workspaces, they can set the category for the workspace they are sharing.
New feature! An OrgAdmin or system administrator now have the ability to delete workspaces owned by other users.
Need more information? Request a consult with us for addition information or training topics by clicking here.
Click here to go back to the Tealeaf Fundamentals main page
