Introduction:
In our last module on simple session search, we illustrated how to search for sessions using basic session search options. Session search offers additional advanced features that allow you to further refine your search, save a search, and view session data specific to defined criteria for increased visibility into user interactions on your site.
Key benefit:
Procedure:
Search for sessions using multiple conditions
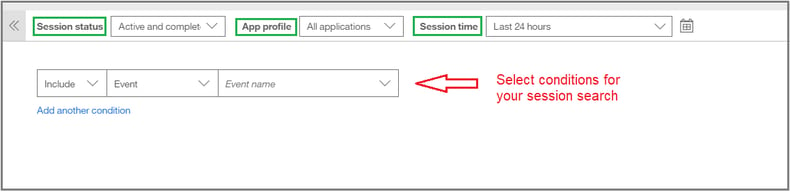
1. Just as with a simple session search, select session search from the left navigation and begin your search for specific sessions you want to analyze by setting values for Session status, Application profile, and Session timeframe, as shown in green in the image below.
2. Then, by setting multiple conditions to further define your session search, as shown by the red arrow in the image below, you can narrow in on particular sessions that meet specific criteria.
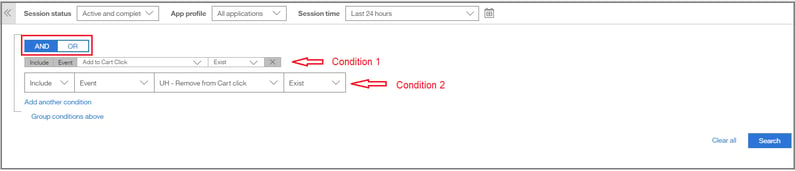
As shown in the image below, you can select to search for sessions that meet the criteria for either Condition 1 or Condition 2, or you can select to search for sessions that meet the criteria for both Condition 1 and Condition 2, offering you flexibility in creating many search options.
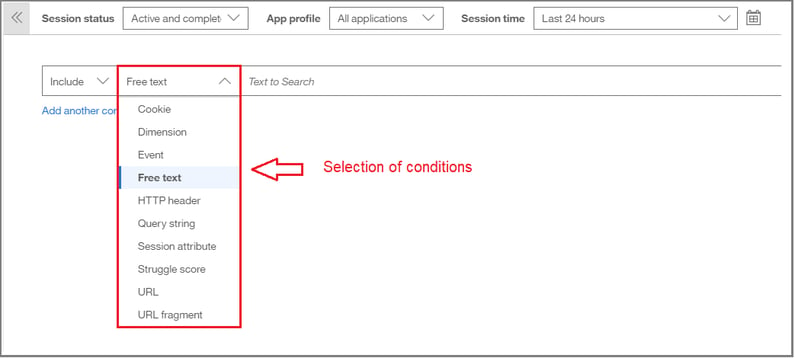
At the same time, there are many conditions from which you can select to narrow your session search, such as filtering by event, dimension, session attribute and many more, as shown below.
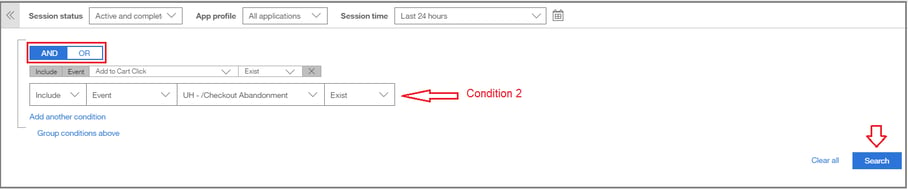
As an example, if you wanted to search for sessions where a user added an item to their cart and then abandoned their purchase at checkout, you could add the following conditions to your session search and specify that both Condition 1 and Condition 2 would need to be met:
In order to do so, select to include the event “add to cart click” as your first condition and then click “Add another condition,” as shown in the image below.

After clicking to “Add another condition,” select “And” to specify that both condition 1 and condition 2 need to be met. Then, select to include the event “Checkout Abandonment” as condition 2, as shown in image below. After the conditions are selected, click Search.
You can also select to add a value to your condition(s) by selecting “Equal” from the drop down menu, as shown in the image below. For example, you could select to add an event which has a promo code as the condition and then specify the value of the promo code (i.e. Save10, etc.)

Save a search or Export a search
If you repeatedly search for the same conditions, you can save the conditions as a template. To do so:
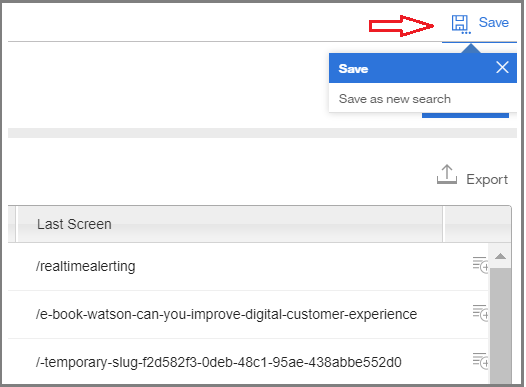
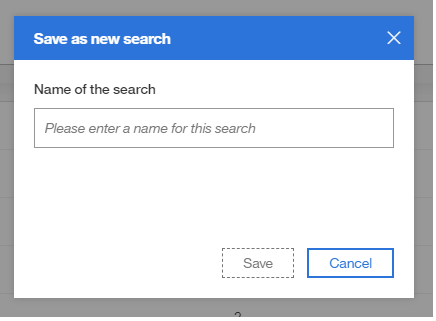
a. On the results page of a search, click save in the upper right corner of the screen, as shown in the first image below. Select save as new search. A window will open where you can enter a name for the search and then click save, as shown in the second image below.
b. The saved search will be added to the navigation panel under Session Search, as shown below.
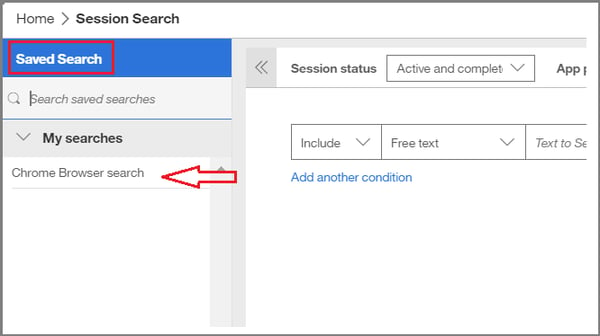 In this example, we have saved a “Chrome Browser” session search
You also have the option to export the session search results to IBM Digital Analytics or to a .pdf, .xls, or .cvs formatted file on your desktop. To do so, select export from the upper right of the search results page, as shown below.
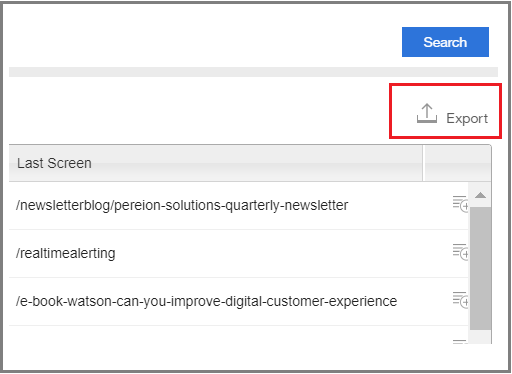 The export icon appears to the right above the list of sessions
View session data
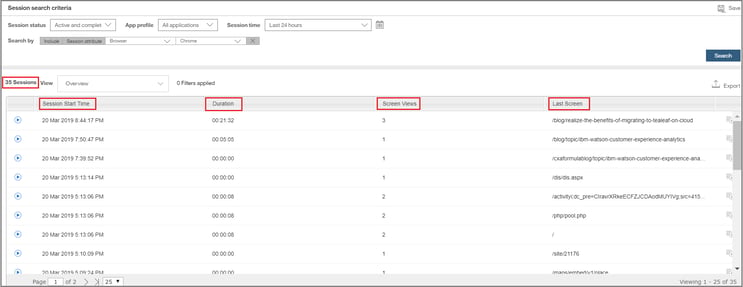
After setting the desired values and conditions for your session search criteria and clicking “Search,” an overview of the session list of those sessions matching the defined criteria will display. The overview of the session list includes the number of sessions matching the defined criteria, as well as the start time, duration, screen views and last screen for each session, as shown in the image below.
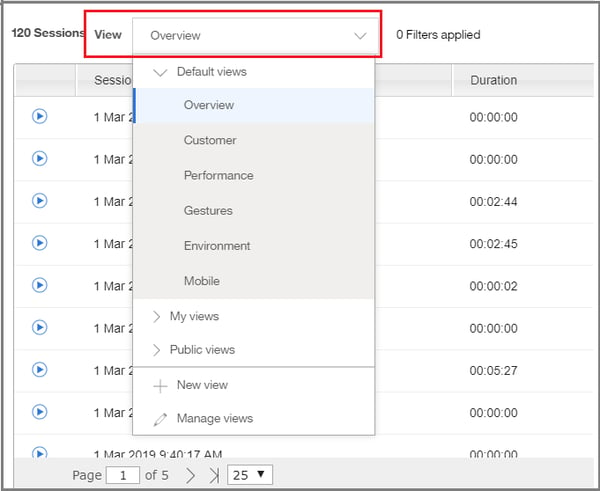
While “Overview” of the session list is the default view, additional default views you can select to analyze session data include customer, performance, gesture, environment and mobile, as shown in the first image below.
After selecting an updated view of the session list, the session view will refresh. For example, by selecting “mobile” as a view, an updated view of the session list will display as shown in the image below.
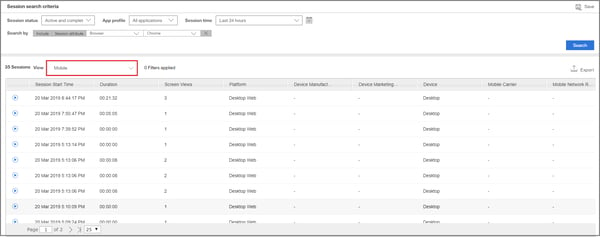 View of session list updated to a view of Mobile in this example
Create and customize session views
In addition to selecting different views of session lists, you can also create and customize a session view.
1. To create a new view, select New view from the View drop-down menu, as shown in the first image below. Give your new view a name and select the columns to add to your new view by selecting from the options displayed and then click save, as shown in the second image below.
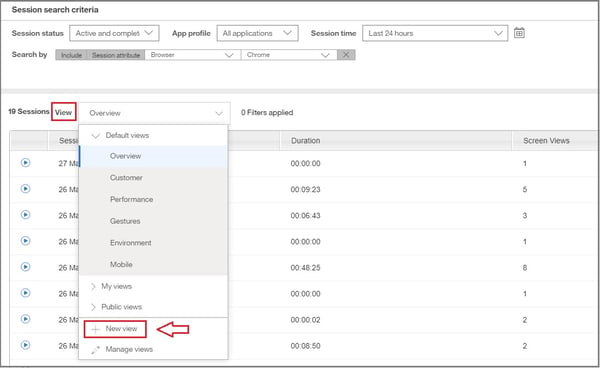 Select "New View"
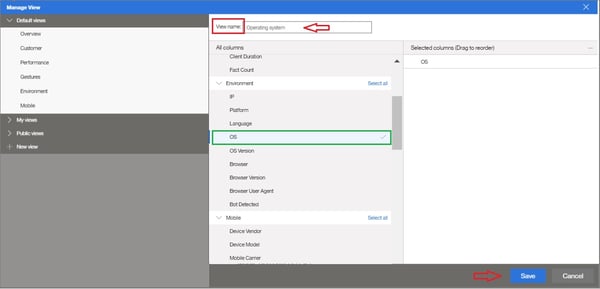 In this example, we have created a new view named “Operating system” and selected OS (Operating System) as a new column to add to session view.
2. To customize a view that you created, select Manage views from the View drop-down menu, as shown in the first image below. Then, under My views, select the view you want to customize and click the plus sign in the upper right to display and select the columns you can add to your session view, as shown in the second image below.
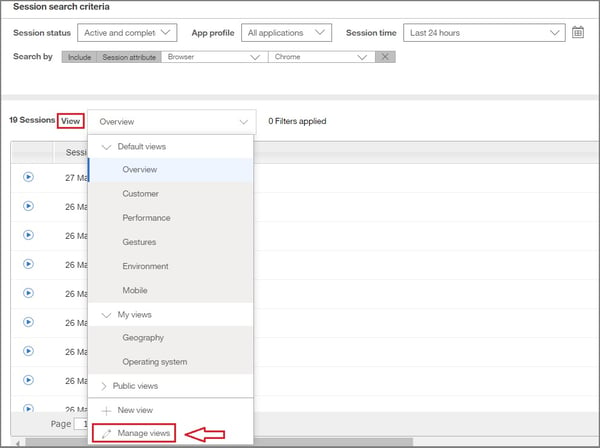 Select to “Manage views”
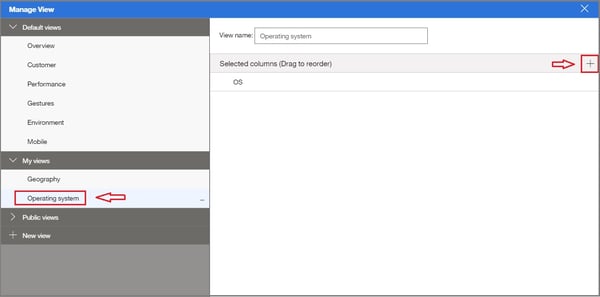 Under My views, select the view you want to customize and then click the plus sign (+)
Select the column(s) you want to add to your view and click save, as shown in the image below. You can also reorder and remove columns as needed to customize your session view.
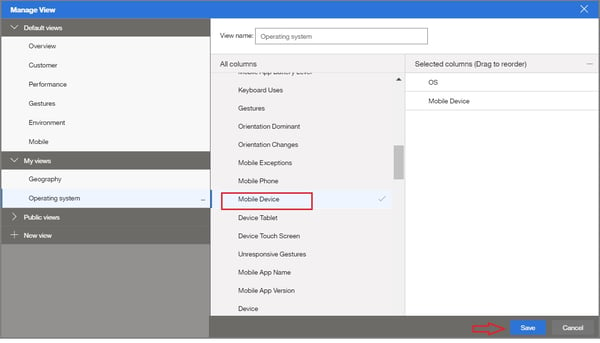 In this example, we have customized our “Operating system” view by adding the additional column of “Mobile Device” to the session view.
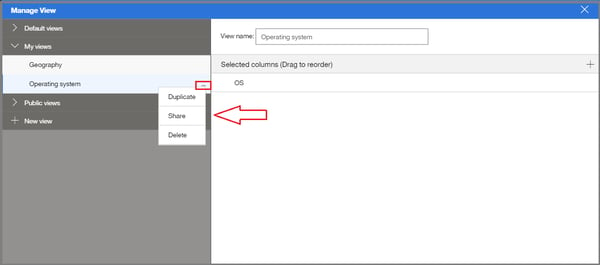
Under Manage View, you can also select to duplicate, share or delete a My view you have created by clicking on the three small dots that appear next to your view, as shown in the image below. The share option allows you to share your customized My view to a public view.
Need more information? Request a consult with us for addition information or training topics by clicking here.
Click here to go back to the Tealeaf Fundamentals main page
